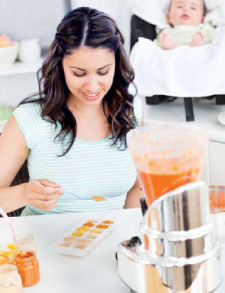
The first two years of your baby’s life is crucial as your little one will experience the greatest level of growth and development. Breastfeeding your baby is the first step to ensuring your baby gains the right types and amounts of nutrients needed.
As your baby grows, his energy and nutritional needs will also increase; thus, complementary feeding should begin at 6 months when breast milk alone is no longer enough to sustain your baby’s needs.
When the sixth month approaches or the tell-tale signs that baby is ready for semi-solid foods begin to show, many new mums often wonder what foods to introduce to their little ones and how to prepare these foods in different textures or consistency to suit their baby’s age.
Although much thought must be given to cooking and preparing your baby’s food as it usually involves pureeing, blending, mashing or steaming the food, it is not a daunting process. In this article, we will show you simple ways to make homemade baby food using different tools and methods, as well as some tips on how you can add flavour and variety to your little one’s food.
What you need to know
It is best to serve foods with appropriate consistency or texture to make it easier for your baby to accept and digest his or her foods. Babies generally start with smooth liquid purees at 6-8 months, then move on to minced, diced and finely chopped soft foods at 8-10 months; and finally to bite-size chunky foods at 10-12 months of age.
It is also good to start your baby on cereal-based foods (eg rice for a few weeks and later, other cereals), followed by fruits and vegetables, and lastly, meats.
Preparing baby’s food
Here are a few ways using different tools to help you make a healthy meal for your little one.
-
Steamer or pots and pans
Steam or boil your baby’s foods until it is cooked. It is best to steam vegetables before pureeing to retain their nutrients. Harder fruits like apples and pears as well as fish, meat and poultry can also be steamed or boiled before blending.
-
Blender or food processor
Once foods that need to be softened have been cooked, add them to a blender or food processor and blend to the consistency your baby requires. Add liquids such as breast milk, formula, water or the cooking water from the food you cooked with to thin out the baby food when necessary.
-
Mash it!
Many foods can be mashed with the good old-fashioned fork or a potato masher. Ripe bananas, steamed sweet potatoes, apples or squash can all be mashed with these tools. This will also depend on what type of texture your baby requires.
-
Use a food mill
Another way to grind or puree foods to make soups, sauces, and mashed potatoes is to cut the foods into smaller pieces and put them through the food mill (the skin and seeds will stay in the mill).
-
Food grinder
Pureeing your baby’s food can also be made easy using a food grinder. This is also a simple way to prepare meats and more textured foods.
-
Sieve or strain to finish homemade baby food
You can use a sieve or strainer to further thin your baby’s food, especially ones that have stubborn skins, such as peas and green beans. Put the food into the sieve or strainer and push it through into a clean bowl.
-
Use a grater
If you want to make finger foods for your baby, the cheese grater is a great tool for grating fruits and veggies. Peel ripe fruits and vegetables like apples and carrots and then grate them using the small slots. This produces small and thin shavings or itty bitty flakes that are easily gummed. You can also use the cheese grater to grate cheeses or soft cooked meats like chicken and beef to make baby finger foods.
Making homemade baby food can be very simple and timefriendly using these various utensils and tools. You can use them according to your preference and the best part is you’ll know exactly what you are feeding your baby.


Comments